
Default <username> is ubuntu.
1. Create AWS LightSail Instance
- Administrator username
- Administrator password
- How to find database credentials?
- Database username
- Database password
- Obtain PostgreSQL root credentials
4. Access Server files using FileZilla
5. Create a New Project using the Shell (Optional)
6. Upload a project from your local machine
b. Add the IP address to allowed hosts
1. Create AWS LightSail Instance
a. Sign into your AWS account and navigate to the Lightsail home page.
b. Click on Create Instance.

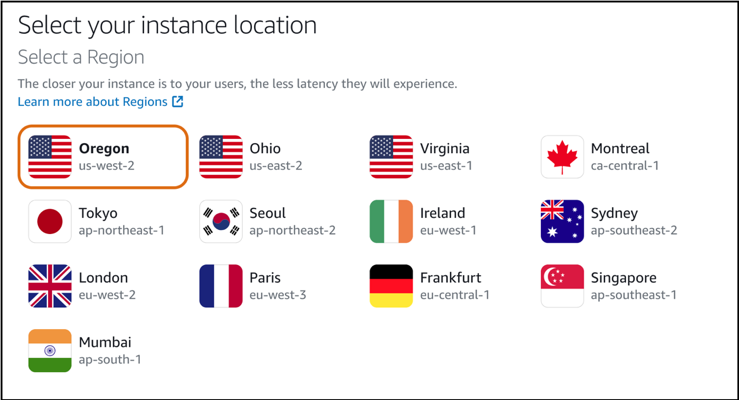
c. Choose the appropriate AWS Region.
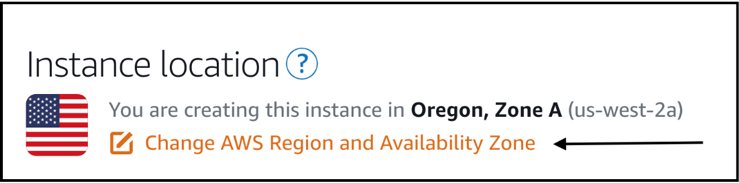
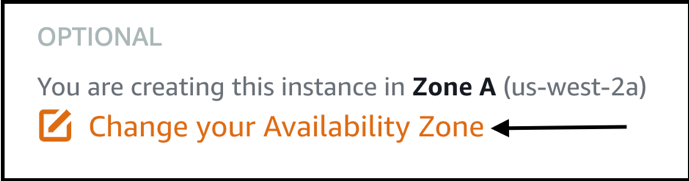
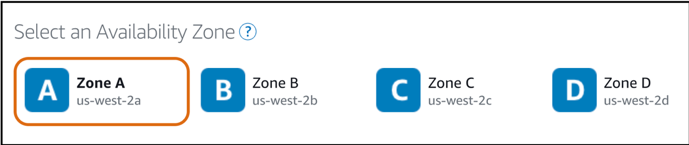
d. Choose an Availability Zone.
e. Under Select a blueprint choose Django.
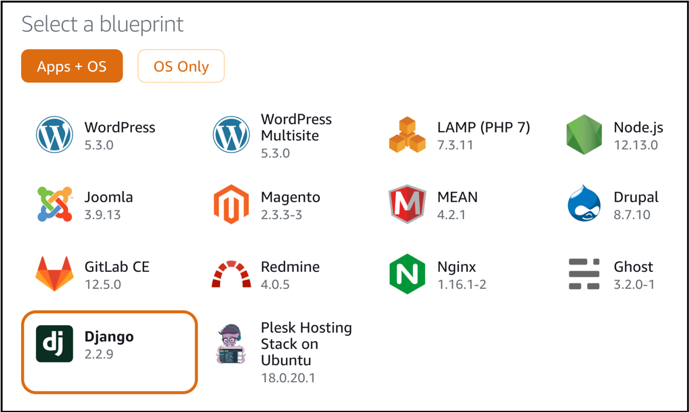
f. You can leave the other settings at their default values. Scroll to the bottom of the screen and click Create Instance.2. Access the shell
Connecting to Lightsail using launchpad
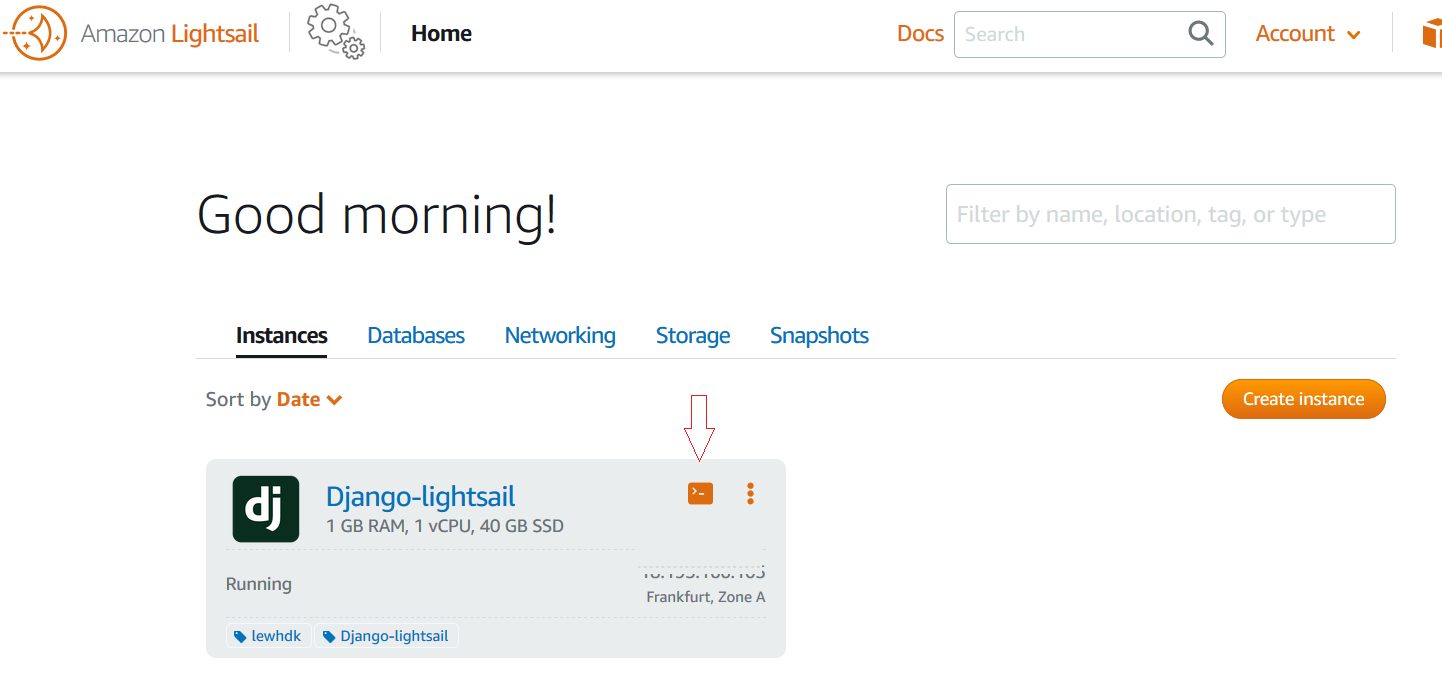
Go to AWS lightsail home page
Next to the name of the instance you want to connect to, click on the launchpad icon
Connecting to Lightsail using SSH
For connecting to our Lightsail instance we will be using SSH in Ubuntu Terminal. Below is the syntax for opening a SSH session with our Lightsail instance.
sudo ssh –i <path to private key file> <username>@<public ip>
In our case, <path to private key> is the downloaded location of the private key file. The private key file has an extension .pem.
Default <username> is ubuntu.
You can get <public ip> from instance page of Lightsail. In our case it is 13.127.218.241.
Get SSH Key

3. Get credentials
The following video shows you the process to obtain the application credentials in Amazon Lightsail:
Administrator username
The application username depends on the application. You can find the application username as follows:
-
Log in to the AWS Console. From the Amazon Web Services menu, select the Lightsail service and choose the server you wish to obtain credentials for.
-
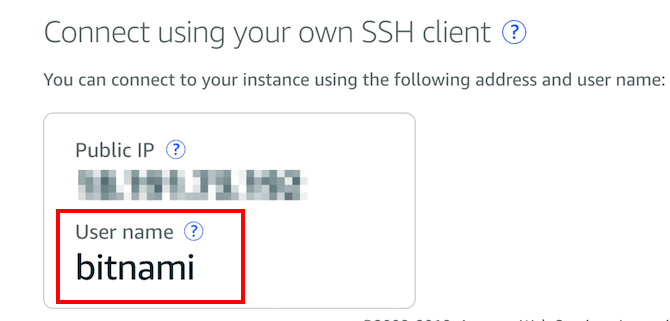
On the server detail page, find the application username in the “Connect using your own SSH client” section:
Administrator password
The application password is randomly generated during the deployment process and stored in a file on the server. This password can be viewed as follows:
-
Log in to the AWS Console. From the Amazon Web Services menu, select the Lightsail service and choose the server you wish to obtain credentials for.
-
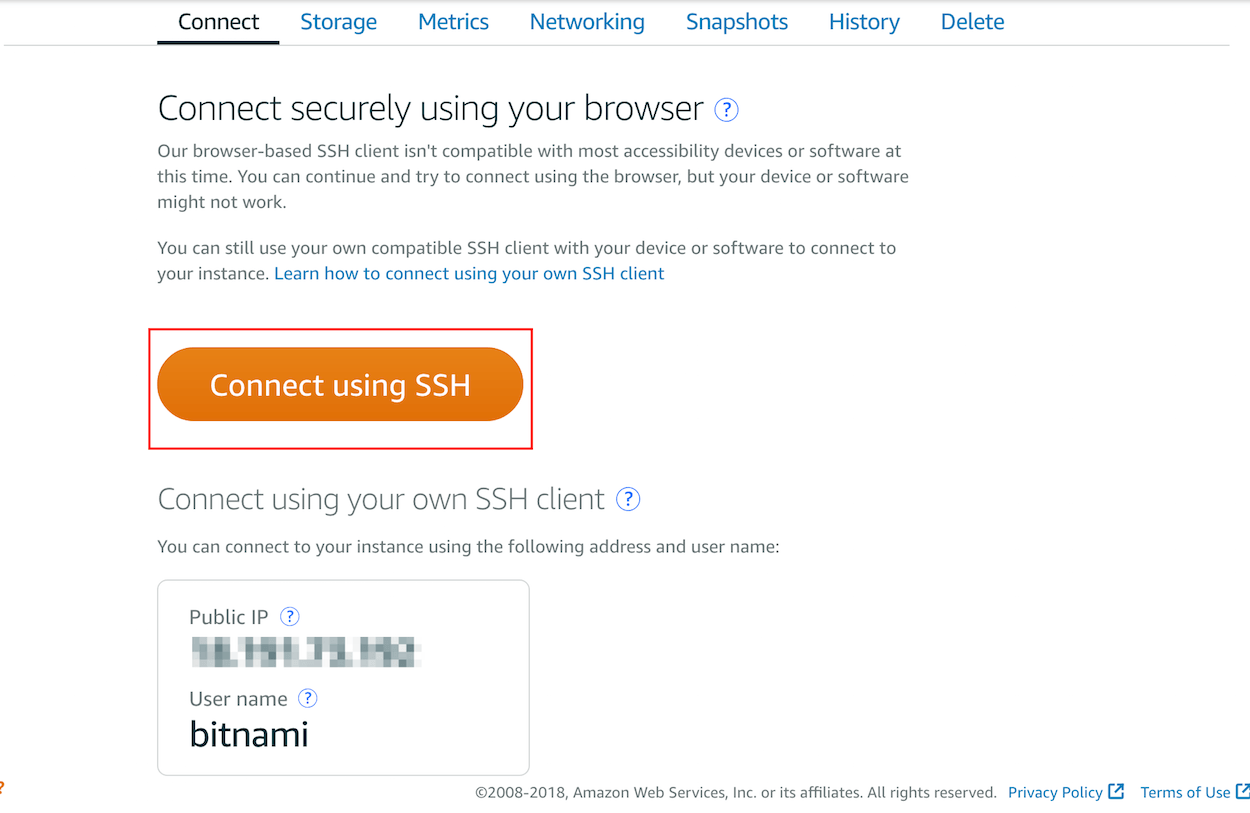
On the server detail page, click the “Connect using SSH” button.
This will initiate a secure SSH connection to the server console in a new browser window. You should see something like this:
-
At the server console, run the command cat bitnami_application_password. This will display the administrative password. Here’s an example:

How to find database credentials?
Database username
If you started a server (for example, MongoDB or similar) that isn’t a Web application server or your application includes a database server, you can use the default administrator user to log in to the database (for example, root). In the table below you will find the username for the most popular databases:
|Database                |Username    |
|------------------------|------------|
|MySQL, MariaDB, MongoDB |root        |
|PostgreSQL              |postgres    |
You can find more information for each specific server in our documentation.
Database password
The database password is the same as the administrator password you use to log in to your application.
Official documentation https://docs.bitnami.com/aws/infrastructure/django/get-started/first-steps/
Obtain PostgreSQL root credentials
Database username: postgres.
Open instance shell and type
cat bitnami_application_password
wzYyqzMyxzw1
4. Access Server files using FileZilla
FileZilla
IMPORTANT: To use FileZilla, your server private key should be in PPK format. Go to Section two
Follow these steps:
-
Download and install FileZilla.
-
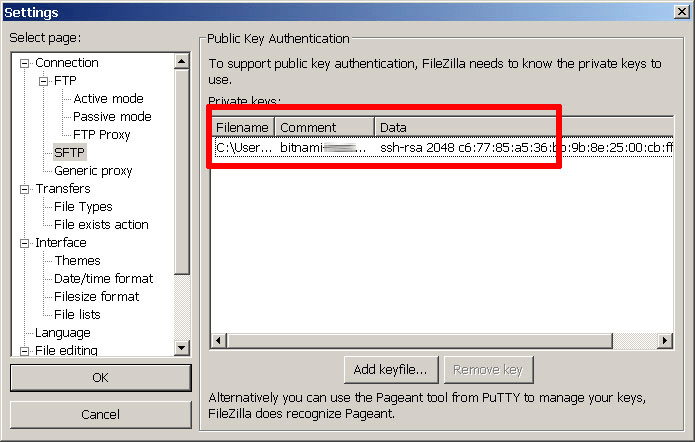
Launch FileZilla and use the “Edit -> Settings” command to bring up FileZilla’s configuration settings.
-
Within the “Connection -> SFTP” section, use the “Add keyfile” command to select the private key file for the server. FileZilla will use this private key to log in to the server.
-
Use the “File -> Site Manager -> New Site” command to bring up the FileZilla Site Manager, where you can set up a connection to your server.
-
Enter your server host name and specify bitnami as the user name.
-
Select “SFTP” as the protocol and “Ask for password” as the logon type.
-
Use the “Connect” button to connect to the server and begin an SFTP session. You might need to accept the server key, by clicking “Yes” or “OK” to proceed.

You should now be logged into the /home/bitnami directory on the server. You can now transfer files by dragging and dropping them from the local server window to the remote server window.
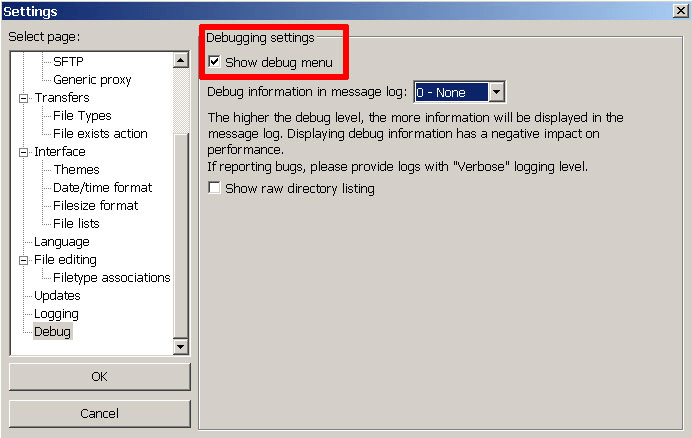
If you have problems accessing your server, get extra information by use the “Edit -> Settings -> Debug” menu to activate FileZilla’s debug log.
Connecting to an instance in Amazon Lightsail using SFTP Resources
-
https://docs.bitnami.com/aws/faq/get-started/connect-ssh/#obtain-ssh-credentials
-
https://docs.bitnami.com/aws/faq/administration/upload-files/
5. Create a New Project using the Shell (Optional)
a. Deploy a Django project
In this section you’re going to deploy a simple “Hello, World” application. You will use Django’s command line to create a new project as well as a new application before adding the actual application code in the next section.
If you already have a Django application written, feel free to use it for this tutorial. However, take note of the directory structure used in the “Hello, World” application, as it will be important when you configure your own application.
|
The Django project will be at the following directory |
/opt/bitnami/apps/django/django_projects/tutorial |
|
The project itself will be stored at the following directory |
/opt/bitnami/apps/django/django_projects/tutorial/tutorial |
|
The app will be created at the following directory |
/opt/bitnami/apps/django/django_projects/tutorial/tutorial/hello_world |
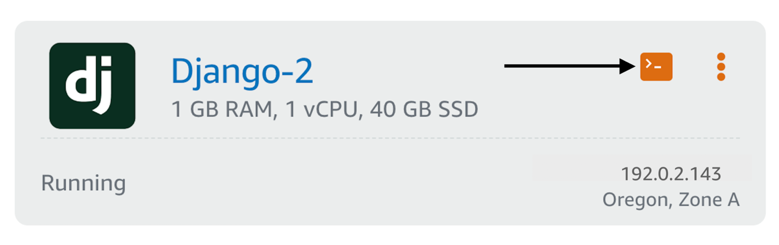
a. From the Lightsail home page click on the browser-based SSH client icon for your Django instance. This will start an SSH session into your instance. All the following commands should be run in that session.
b. Enter the following commands to change into the django_projects directory, and create a new tutorial project.
cd /opt/bitnami/apps/django/django_projects && \
django-admin.py startproject tutorial
c. Enter the following command to change into the tutorial project directory, and create a new hello_world app.
cd tutorial && python3 manage.py startapp hello_world
b. Add your application code
Now that you have the scaffolding in place for your application, it’s time to add some code. The application will simply display “Hello, World” whenever the web page is loaded.
You should still be executing these commands in the Lightsail browser-based SSH client window.
a. Enter the following command to open the views.py file using the Vim text editor:
sudo vim /opt/bitnami/apps/django/django_projects/tutorial/hello_world/views.py
b. Press I to edit the file, and replace the existing code with the following:
from django.http import HttpResponse

def index(request):
     return HttpResponse("Hello, world")
c. Press Esc, type :wq! , and press Enter to save and quit Vim.
d. Enter the following command to create a urls.py file for your application in the same directory as the views.py file:
sudo vim /opt/bitnami/apps/django/django_projects/tutorial/hello_world/urls.py
e. Press I to edit the file, and add the following code:
from django.urls import path
from . import views

urlpatterns = [
     path('', views.index, name='index'),
]
f. Press the Esc, type :wq! , and press Enter to save and quit Vim.
g. Enter the following command to open the urls.py file:
sudo vim /opt/bitnami/apps/django/django_projects/tutorial/tutorial/urls.py
h. Press I to edit the file, and replace the existing code with the following:
from django.contrib import admin
from django.urls import include, path

urlpatterns = [
    path('', include('hello_world.urls')),
    path('admin/', admin.site.urls),
]
i. Press the Esc, type :wq! , and press Enter to save and quit Vim.
* To test your app skip part 6
6. Upload a project from your local machine
a. DataBase
You either create a new database or use the one which already created with example
Use the already the database from the example (Option 1)
-
Download the example project
-
Open settings.py file
-
Copy the Database info and paste it to your project settings.py file
ex:
DATABASES = {
    'default': {
        'ENGINE': 'django.db.backends.postgresql_psycopg2',
        'NAME': 'djangostack',
        'HOST': '/opt/bitnami/postgresql',
        'PORT': '5432',
        'USER': 'bitnami',
        'PASSWORD': '2425de1e84'
    }
}

EXAMPLE_DATABASES = {
    'default': {
        'ENGINE': 'django.db.backends.sqlite3',
        'NAME': os.path.join(BASE_DIR, 'db.sqlite3'),
    }
}
Create a new database and user (Option 2)
These are the basic steps to create a new database and user for your applications:
-
Create a new role by executing the createuser command. With the options below, the new role will not be a superuser and will not have privileges for creating new databases or new roles (this is usually the default for the createuser command).
createuser -U postgres USER_NAME -S -D -R -PYou will be prompted to enter first the password for the new role and to reenter it, and then to enter the postgres role password.
- Create a new database with the new role as the owner:
createdb -U postgres DATABASE_NAME -O USER_NAME
b. Add the IP address to allowed hosts
-
From AWS LightSail console get the public IP address
-
Add it to allowed_hosts in setting.py ex: ALLOWED_HOSTS = [‘192.0.2.143’]
c. Upload your files
-
Connect to your server using FileZilla
-
Upload your project folder to this folder /opt/bitnami/apps/django/django_projects/
d. Makemigarions and Migrate
-
Load the shell in AWS lightSail console
-
Change directory to the main app of your project directory
-
virtualenv -p python3 pipenv
-
source pipenv/bin/activate
-
pip install –upgrade pip better to reboot server
-
pip install -r req.txt
-
python manage.py makemigrations
-
python manage.py migrate
7. Test and Configure server
4. Test the application
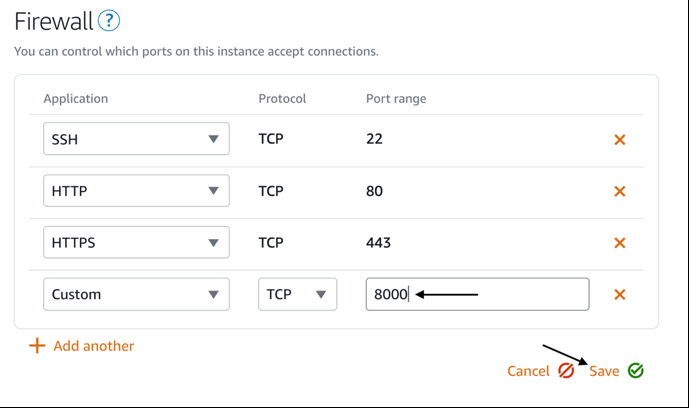
Next, you’re going to use Django’s built-in web server to verify everything is working as expected. By default, Apache is using port 80 on your Lightsail instance, so you’ll run the Django web server on port 8000. To be able to access the website, you’ll need to open port 8000 on the Lightsail firewall.
a. Return to the Lightsail home page and click on the name of your Django instance.
b. From the horizontal menu click Networking.


d. Under Port Range enter 8000 and click Save.

sudo vim /opt/bitnami/apps/django/django_projects/tutorial/tutorial/settings.py
g. Press I and change the ALLOWED_HOSTS line to include the IP Address of your Lightsail instance as shown in the following example.
Note: When editing your settings.py file, be sure to replace 192.0.2.143 with the public IP address of your instance.
ALLOWED_HOSTS = ['192.0.2.143']
h. Press the Esc, type :wq! , and press Enter to save and quit Vim.
i. Enter the following command to start Django’s web server on port 8000:
cd /opt/bitnami/apps/django/django_projects/tutorial/ && python3 manage.py runserver 0.0.0.0:8000
j. Point your web browser at port 8000 of the instances IP address (e.g. http:// 192.0.2.143:8000).
You should see “Hello, world”, which confirms that your application is running.
5. Host the application using Apache
It’s not recommended to run production applications using Django’s built-in server. So, in this final section you’ll configure Apache to serve your application.
You’ll do this by configuring the application to use Web Services Gateway Interface (WSGI), and then create an Apache virtual host (vHost).
You should still be executing these commands in the Lightsail browser-based SSH client window.
a. Type the following command to edit the wsgi.py file:
sudo vim /opt/bitnami/apps/django/django_projects/tutorial/tutorial/wsgi.py
b. Type :1$d and press Enter to select all, and delete the existing contents of the wsgi.py file.
c. Press I to edit, and add the following code to the wsgi.py file:
import os
import sys
sys.path.append('/opt/bitnami/apps/django/django_projects/tutorial')
os.environ.setdefault("PYTHON_EGG_CACHE", "/opt/bitnami/apps/django/django_projects/tutorial/egg_cache")
os.environ.setdefault("DJANGO_SETTINGS_MODULE", "tutorial.settings")
from django.core.wsgi import get_wsgi_application
application = get_wsgi_application()
d. Press the Esc, type :wq! , and press Enter to save and quit Vim.
e. Enter the following command to create a conf directory for your application
mkdir /opt/bitnami/apps/django/django_projects/tutorial/conf
g. Press I to edit, and add the following code:
h. Press the Esc, type :wq! , and press Enter to save and quit Vim.
i. Enter the following command to create a httpd-prefix.conf file in the conf directory for your application:
sudo vim /opt/bitnami/apps/django/django_projects/tutorial/conf/httpd-prefix.conf
j. Press I to edit, and add the following code:
Include "/opt/bitnami/apps/django/django_projects/tutorial/conf/httpd-app.conf"
k. Press the Esc, type :wq!, and press Enter to save and quit Vim.
l. Enter the following command to open the bitnami-apps-prefix.conf file:
sudo vim /opt/bitnami/apache2/conf/bitnami/bitnami-apps-prefix.conf
m. Press I to edit, and add the following line to the end of the file:
Include "/opt/bitnami/apps/django/django_projects/tutorial/conf/httpd-prefix.conf"
n. Press the Esc, type :wq! , and press Enter to save and quit Vim.
o. Enter the following command to open the bitnami.conf file:
sudo vim /opt/bitnami/apache2/conf/bitnami/bitnami.conf
p. Type :1,$d and press Enter in Vim to select all, and delete the contents of the wsgi.py file.
q. Press I to edit, and add the following code to the file:
    WSGIScriptAlias / /opt/bitnami/apps/django/django_projects/tutorial/tutorial/wsgi.py


    AllowOverride all
        Require all granted
        Options FollowSymlinks


    DocumentRoot /opt/bitnami/apps/django/django_projects/tutorial
r. Press the Esc, type :wq!, and press Enter to save and quit Vim.
s. Enter the following command to restart Apache:
sudo /opt/bitnami/ctlscript.sh restart apache
t. Point your web browser at the IP address of your instance (e.g. http:// 192.0.2.143).
You should see “Hello, world”, which confirms that your application is running.
8. Link your domain
Creating a DNS zone to manage your domain’s DNS records in Amazon Lightsail
https://lightsail.aws.amazon.com/ls/docs/en_us/articles/lightsail-how-to-create-dns-entry
Using Let’s Encrypt SSL certificates with your instance in Amazon Lightsail
9. Upgrade Your Instance
Upgrade to EC2
https://aws.amazon.com/lightsail/features/upgrade-to-ec2/?fpdp4=upgrade
How do I change my Lightsail plan?
https://aws.amazon.com/premiumsupport/knowledge-center/change-lightsail-plan/
Creating a larger instance, block storage disk, or database from a snapshot in Amazon Lightsail
Resources:
-
(Lightsail) Deploy Django-based application onto Amazon Lightsail https://aws.amazon.com/getting-started/projects/deploy-python-application/
-
https://www.nerdsgene.com/Article/DeployDjangoToLightSail#replies28
-
AWS Lightsail Overview https://aws.amazon.com/lightsail/